Including a simple form
The next step in our index.vm file is to include a form to send data to our server.
In order to achieve this, we’ll replace the <body> of our page with the following:
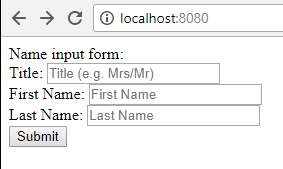
Name input form:
<form action="/nameServlet">
	<label for="title">Title:</label>
	<input type="text" id="title" name="title" placeholder="Title (e.g. Mrs/Mr)"></input>
	<br>
	<label for="firstName">First Name:</label>
	<input type="text" id="firstName" name="firstName" placeholder="First Name"></input>
	<br>
	<label for="lastName">Last Name:</label>
	<input type="text" id="lastName" name="lastName" placeholder="Last Name"></input>
	<br>
	<input type="submit" value="Submit"></input>
</form>
The form currently points to /nameServlet which we need to define and we’ll do in the next section.
Other than that, the form is a very simple HTML form that receives a title, first name and last name from the user.
Defining the name servlet
We’ll create a new Servlet class that will process the user input. For the purpose of the tutorial, the processing will be a concatenation of the 3 parts of the input (Title + First Name + Last Name), converted to upper case.
This new class will inherit from HttpServlet and will only respond to GET requests.
public class NameServlet extends HttpServlet {

    @Override
    protected void doGet(HttpServletRequest req, HttpServletResponse resp) throws ServletException, IOException {
        String title = req.getParameter("title");
        String firstName = req.getParameter("firstName");
        String lastName = req.getParameter("lastName");

        String processedName = String.format("%s %s %s", title, firstName, lastName).toUpperCase();

        resp.getWriter().println(processedName);
    }
}
Adding the name servlet to the server
The last step is to connect our new servlet with our Jetty server. For this, all we need to do is add it in the Application class:
servletContext.addServlet(NameServlet.class, "/nameServlet");We ask Jetty to map the NameServlet to the /nameServlet path as this is the path we are using in our HTML form.
Testing our setup
If we run our application again and open it in our browser (http://localhost:8080), you should now see the simple form we added above:
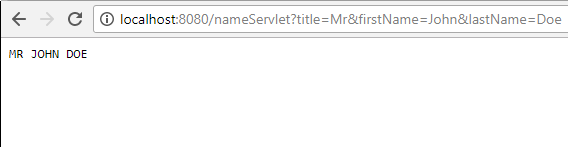
Give it a try, input some values and click Submit:
You should get a response page with the name in upper case, for example:
However, we still aren’t using Velocity as the template engine to render our View. We’ll add this in the next step.