Configuring our Jetty server
As we’re using an embedded Jetty server, our first step will be to configure a very basic server where we’ll add the servlets we require.
In our Application.java file we’ll initialize the server adding the following steps:
public static void main(String[] args) throws Exception {
    // create a new HTTP server that listens on port 8080
    Server httpServer = new Server(8080);

    // create a new servlet context where we'll add the servlets
    ServletContextHandler servletContext = new ServletContextHandler(null, "/", true, false);

    // configure the VelocityViewServlet (from the velocity-tools library)
    servletContext.addServlet(VelocityViewServlet.class, "*.vm");

    // add and configure the DefaultServlet from Jetty to handle correctly the welcome file redirection
    servletContext.setInitParameter("org.eclipse.jetty.servlet.Default.welcomeServlets", "true");
    servletContext.setInitParameter("org.eclipse.jetty.servlet.Default.dirAllowed", "false");
    servletContext.addServlet(DefaultServlet.class, "/");

    // add a resource base to tell Jetty where we'll be serving static files from (in case you want
    // to load e.g. images/css/other static files)
    // Note: We won't use this, but need to configure a resource base for the DefaultServlet to work
    // correctly
    servletContext.setResourceBase("./");

    servletContext.setWelcomeFiles(new String[] { "index.vm" });

    // tell the httpServer to use the servletContext to handle incoming HTTP
    // requests
    httpServer.setHandler(servletContext);

    httpServer.start();

    // wait for the server to stop before we stop the application
    httpServer.join();
}
For the purpose of this tutorial, we’re adding this in the main method directly.
In the code above, you’ll notice references to two servlets that come from underlying libraries:
-
The
VelocityViewServletthat comes from the Velocity Tools project and handles incoming HTTP requests that require Velocity templates (hence why we’re mapping it only to *.vm files) -
The
DefaultServletthat comes from Jetty itself and we’re adding it to handle requests to the default path (e.g. http://myserver:8080/) and let it forward the request to the specified welcome file.
You’ll see that we are adding a welcome file called index.vm, which will act as our home page for the server. This page, doesn’t exist yet, so we need to add it.
Defining our basic home page
We’ll add this index.vm file under our src/main/resources folder. Please note that alternatively, if you are deploying the war file to an application server (instead of using an embedded an app server as we’re doing in this tutorial), you can/should add this file under your web app folder. There are different ways to doing this, so choose the one that makes most sense in your project setup.
We’ll start with a very basic index.vm file and we’ll add changes to it later:
<html>
	<head>
		<title>Sample Project</title>
	</head>
	<body>
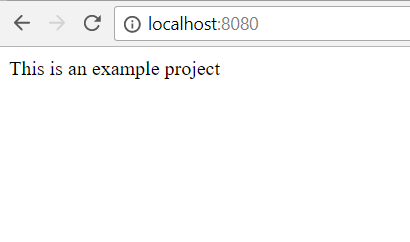
		This is an example project
	</body>
</html>
Configuring Velocity
As the last item in this step of the tutorial, we want to add a velocity.properties configuration file to change the way Velocity loads the templates.
By default (at the time of writing this tutorial), Velocity looks for the template files in the File system. For our project, we don’t want that. We want Velocity to load the files from the classpath for our project.
Similar to the above, there are different approaches, and I’d recommend reading this guide http://velocity.apache.org/engine/2.0/webapps.html for more details.
In our case, we want to add a velocity.properties file under src/main/resources/WEB-INF with the following:
resource.loader=webapp
webapp.resource.loader.class=org.apache.velocity.runtime.resource.loader.ClasspathResourceLoader
In particular, the second line changes the Resource Loader implementation class to the want we want to use for this project.
Testing our initial setup
At this stage, you should be able to run the application (either via an IDE or running gradlew run). In both cases, we use the io.jcoder.tutorial.Application class as our entry point.
Once started, you should be able to open a browser and load http://localhost:8080/ and you should see:
