We recommend using an IDE and using the one you feel most comfortable with. Eclipse is a free option and IntelliJ has both a free and a paid version that includes additional features.
You’ll find multiple comparisons between IDEs and you’ll possibly try to make a decision on what the best option is. My recommendation is to try both and see which one feels the best for you.
Eclipse
If you’re planning to use Eclipse, we’d recommend installing the Eclipse IDE for Java Developers package to start with.
Make sure you download an Eclipse version that is compatible with your Java version, this is, if you have a 64-bit Java version installed, make sure you download a 64-bit Eclipse version.
The file you download will be a Zip file that you can unpack anywhere in your computer.
Once you start Eclipse, you’ll get a dialog asking you for a Workspace location. This is where you want Eclipse to store your preferences and other configuration files. Feel free to use the default initially, you can change this later, and you can configure multiple Workspaces.
Once Eclipse launches, it will display a Welcome screen. Navigate around the different options it provides, however, I tend to close this Welcome tab and use the options it provides from the top menu, contextual menus and keyboard shortcuts once you start getting familiar with them.
You should end up with something that looks like this:
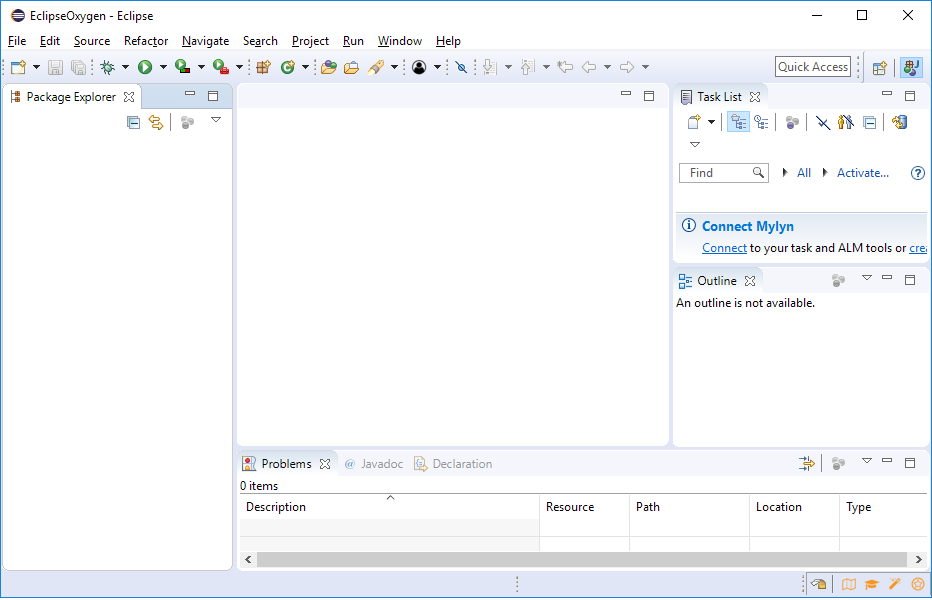
Eclipse has multiple Views, but for the purpose of this tutorial, on a fresh install of Eclipse, you’ll find:
-
The list of projects you’ve created or imported on the left hand side (under the
Package Explorertab). -
In the center, the code/text editors.
-
In the right hand side, the
Outlineof the code. -
In the bottom, the list of
Problemsin case you have compilation errors.
You can add other Views that are available under the Window → Show View menu option. You can also re-arrange the different Views in Eclipse by drag-n-drop if you prefer a different layout.
We’ll show how to import and execute projects in the next section.
IntelliJ
If you want to try IntelliJ you can download the installer. For the purpose of most the beginner tutorials and courses the Community Edition should be enough. Of course, feel free to give the Ultimate Edition a try.
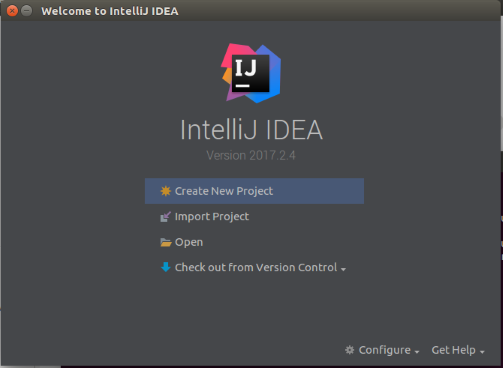
Once you install IntelliJ and run it for the first time, you’ll be asked to choose a theme for your IDE (don’t worry, you can change this later) and other initial customization settings. For the screenshot below, I chose the Darcula theme, so your end result might look a bit different.
We’ll show how to import and execute projects in the next section.
Other IDEs
There are other Java IDEs in the market, for example NetBeans and there is no reason you couldn’t use them. For our tutorials though, make sure you are familiar about how to integrate a Gradle project to the IDE of your choice.