In the JCoder website, most of our tutorials make use of Gradle as the build system for our projects. Using a build system makes it easier to manage your Java project and gives readers a standard approach in all of our tutorials.
As not all readers know about Gradle, we’ve put together this tutorial where we’ll show how to import a Gradle project into Eclipse and IntelliJ.
Video Tutorial for Eclipse
In case you prefer the video version instead of the text version we’ve prepared a video for importing Gradle projects into Eclipse.
Downloading an example project
For this exercise I’d recommend either downloading or cloning the example Java project using the GitHub link on the left hand side of this page (next to the Table of Contents header). Once you have the code in your machine, you’ll find a project with the following structure:
-
build.gradle: This is the main configuration file for our Gradle project and is what defines how our build process will look like for our project.
Inside that file, you’ll see we apply a plugin:apply plugin: 'java'that prepares a lot of the heavy-lifting for us and configures our Gradle project as a Java project.
For more details, you can check the Java Gradle plugin page here. -
src/main/java: This is the folder where we’ll add our Java files.
Other files and folders will be covered in later tutorials and courses.
Importing the project into Eclipse
The Buildship Eclipse plugin
In the most recent versions of Eclipse, the Buildship plugin comes installed by default.
If you have an older version of Eclipse you might need to install it manually.
This plugin is the one that provides Gradle support for Eclipse.
Importing the project
To start the importing process, you can either a) select the File → Import… option or b) right-click inside the Package Explorer tab (anywhere inside the tab) and click Import… in the context menu that appears.
In the Import dialog, select Gradle → Existing Gradle Project and click Next
You’ll then be shown a wizard to import the project:
-
The first screen is a welcome screen, so no input required here, click
Next -
In the second step, the wizard will ask us for the
Project Root, this would be the folder where you downloaded theExample projectat the beginning of this section. Make sure you select the folder that contains thebuild.gradlefile and clickNext. -
For the remaining steps you can leave the default options and proceed with the Import wizard or click
Finish.
Checking the project
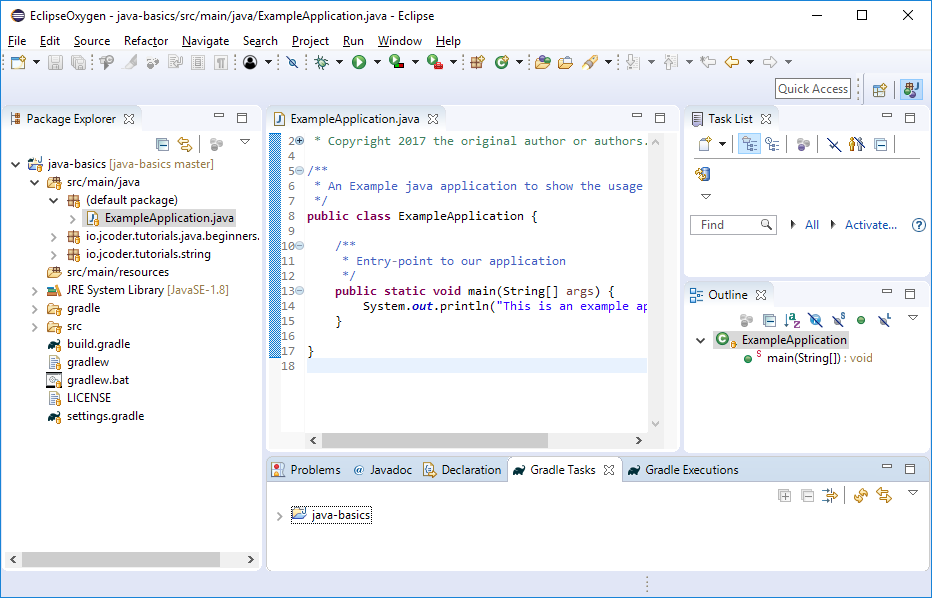
Once the project is imported, it should be displayed in the Package Explorer tab. You can expand the project to check the files. Look for the ExampleApplication.java file which should be inside the src/main/java folder under the (default package) and double-click on it.
You should be seeing something like this:

Compiling the project
Remember the javac command? Eclipse should be running this for you behind the scenes automatically, so you don’t need to worry about this for the example projects we’ll be covering.
This means your project is being built/compiled as you add/change/remove code.
Running the ExampleApplication Java application
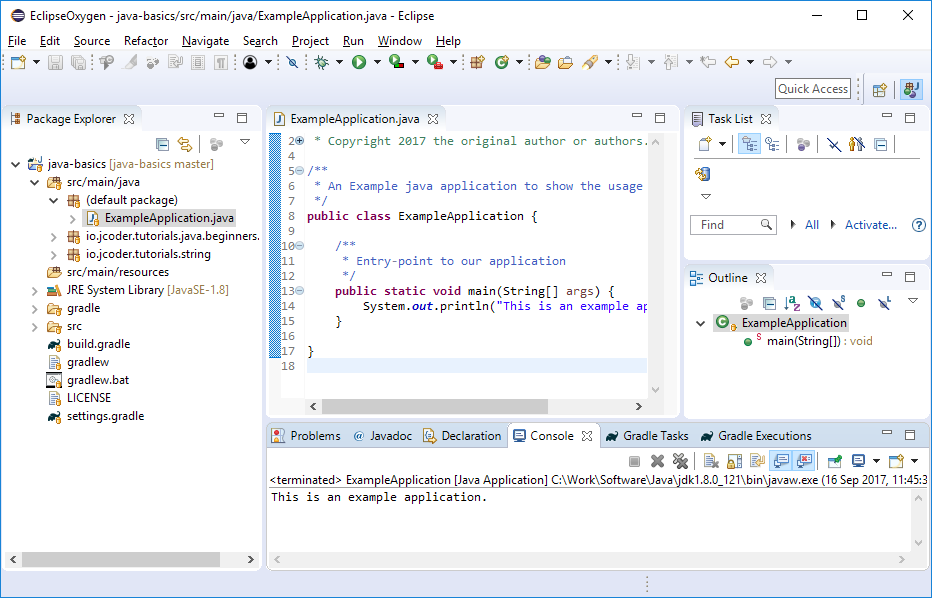
Inside of the Package Explorer tab, right-click on the ExampleApplication.java file. You should be offered a context menu that has a Run As option, hover over it and then click on Java Application.
If everything worked ok, Eclipse should open a Console view on the bottom with the output of our application.
